Managing Your Activities: Categories, Productivity Scores, and Ignoring Apps
Every app and website RescueTime tracks is assigned a productivity level and a category. Getting these right is the most important thing you can do to make your data accurate.
RescueTime sets defaults based on how most users classify activities, but everyone's work is unique. This article explains how to adjust categories and productivity levels, and how to delete or ignore activities you don't want tracked.
Productivity levels
Every activity is assigned one of five productivity levels. These levels are what contribute to your Productivity Pulse and determine how time is counted in your reports. Personal and distracting activities are blocked during Focus Sessions.
💡 RescueTime's defaults are based on how most users classify each activity, but they may not match how you use a particular app. A developer using YouTube for coding tutorials can move it to Other Work. A social media manager can move Instagram from Distracting to Focus Work.
Categories
Categories group your activities by the type of work they represent, like Communication & Scheduling, Design & Composition, Software Development, or Social Networking. They let you see not just how productive you were, but what kind of work you were doing.
Each category has a set of sub-categories for more granular grouping. For example, Business contains sub-categories like Accounting, Sales, and Marketing.
RescueTime assigns categories based on global defaults. You can change the category for any individual activity, and you can add custom sub-categories. However, existing categories themselves cannot be renamed or removed.
Go to Activities in the top navigation. This page shows all your tracked apps and websites arranged into four productivity columns. It's the fastest way to scan your full activity list and make adjustments. You can see everything at once and reclassify with a single click.

Changing productivity levels
Hover over any activity card to reveal arrows on either side. Click the left or right arrow to move the activity one column in that direction, changing its productivity level. The change affects all past and future data for that activity.
To change both the category and productivity level at the same time, hover over the card and click More Details. This opens the full edit view.
Managing categories
Click Manage categories at the top of the Activities page to open a modal showing all activity categories and their default productivity levels. From here, you can change the default productivity level for any sub-category.

You can also add custom sub-categories by clicking Add a new sub-category within any category.
Categories cannot be edited or removed. You can only adjust their default productivity levels and add sub-categories. To reset all your custom categorizations back to RescueTime defaults, click Clear customizations at the bottom of the Activities page.
Sorting uncategorized activities
New or unusual apps and websites that RescueTime doesn't recognize are placed in Uncategorized. Click Sort uncategorized at the top of the Activities page to open a focused modal showing only these unassigned items. Assign a category and productivity level to each one to keep your reports accurate.

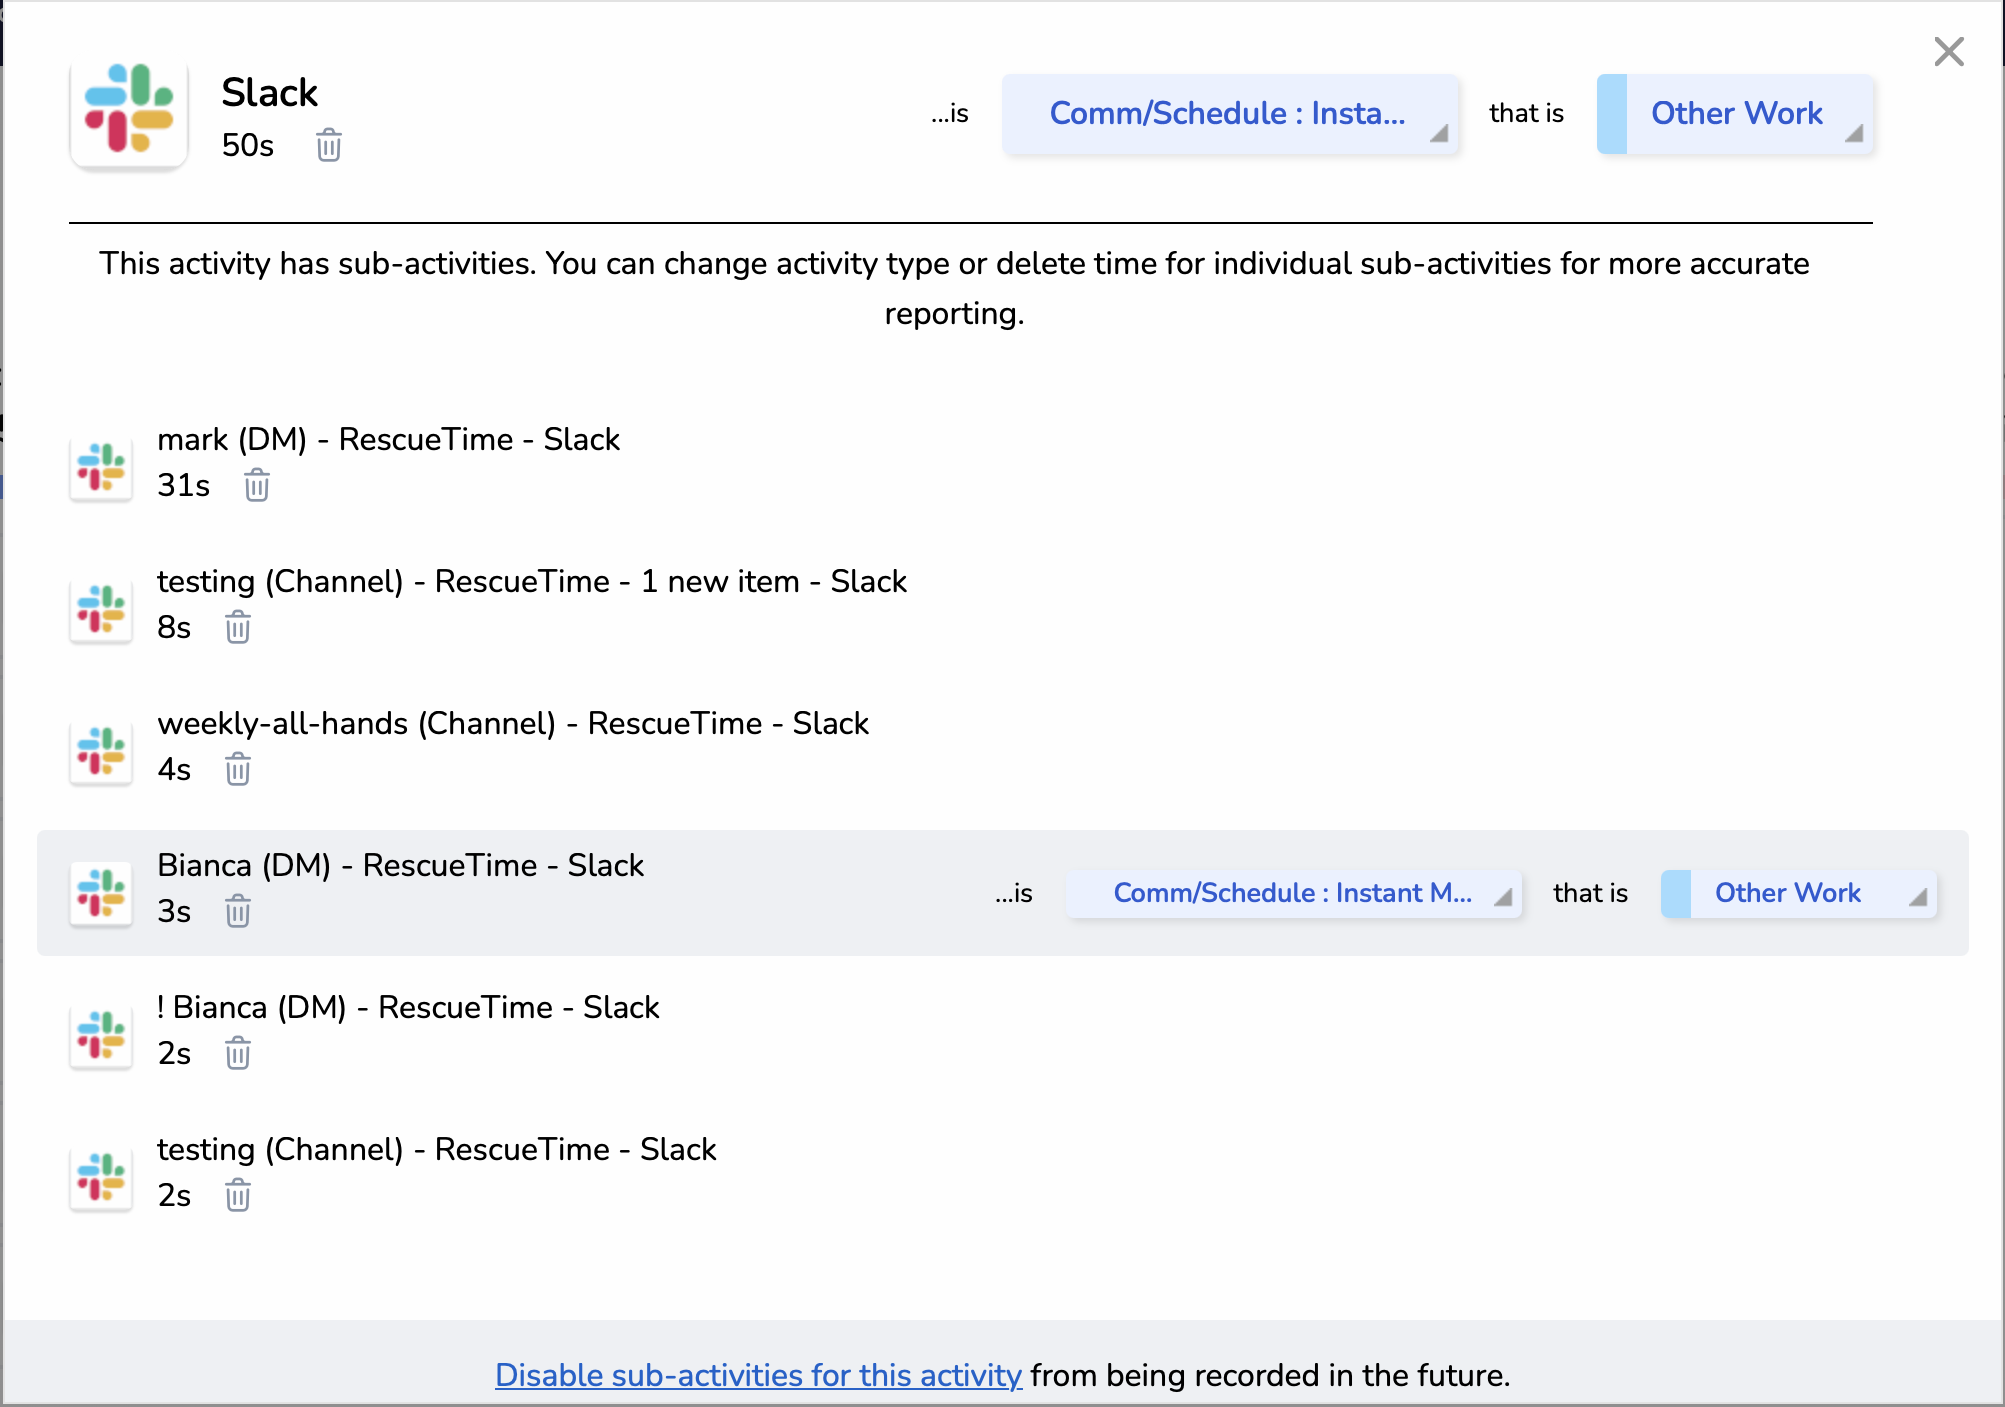
Go to Focus → Personal Reports → Apps & Websites. This view shows your activities as a ranked list with time totals. You can make the same category and productivity adjustments here as on the Activities page, but with more granularity. For activities with sub-activities, different contexts (a work-related DM vs. a personal DM, for example) can be classified differently.
Changing category and productivity level
Click the edit icon on any activity row to reveal its current category and sub-category on the right side of the row. Click the new category and sub-category to make a change.

Click the productivity level dropdown (the colored dot + label) to change between Focus Work, Other Work, Neutral, Personal, and Distracting.

Managing multiple activities
Use the Edit multiple link in the upper right of any report to select several activities at once. From there, you can recategorize, update productivity scores, delete, or ignore them all in a single action.

💡 Sub-activity editing is only available from the Activities page, not from the Apps & Websites Report. If you need to reclassify a specific Zoom meeting type or Slack channel, this is where to do it.
Deleting time
Deleting removes logged time from your reports for the date range you're currently viewing. It does not affect future tracking. The activity will continue to be recorded.
Deletion is permanent. Deleted time cannot be recovered. Make sure you have the right date range selected before deleting.
Delete a single activity
- Go to Focus → Personal Reports → Apps & Websites
- Set the date range to the period you want to delete from
- Hover over the activity and click the edit icon on the far right
- Select Delete this [time]

Delete multiple activities at once
- Go to Focus → Personal Reports → Apps & Websites
- Click Edit multiple in the top right
- Check the box next to each activity you want to delete
- Click Delete
Ignoring an activity forever
Ignoring an activity does two things: it deletes all historical time logged for that activity, and it stops RescueTime from tracking it in the future.
Ignoring permanently deletes all past time for that activity. This cannot be recovered. The activity stops appearing in reports immediately.
Common reasons to ignore an activity
- A virtual machine application (ignore the VM on the host OS and install RescueTime inside the VM instead)
- Software updaters, installer files, or system utilities that create noise in your reports
- An unsupported browser being tracked as a whole when using the extension workaround
How to ignore an activity
- Go to Focus → Personal Reports → Apps & Websites
- Hover over the activity and click the edit icon
- Select Ignore this activity forever
How to un-ignore an activity
Ignoring can be reversed, but past deleted data cannot be restored.
- Go to Account Settings → Data & Privacy
- Click Manage ignored activities
- Click the trash icon next to the activity you want to restore