Setting Up Your Work Schedule, Profile, and Notifications
This article covers how to configure RescueTime to match your work habits. Create your profile, schedule, and break times. Choose what gets tracked, and how you're notified. These settings can be updated at any time.
Work Profile
Your Work Profile tells RescueTime about your work status (full-time, part-time, freelance, etc.) and organization size. RescueTime uses this to calculate a personalized daily Focus Work Goal that fits your context.
These settings are set during onboarding, but can be updated at any time under Account Settings → Work Profile.
💡 Your Focus Work Goal can also be set manually. Go to Account Settings → Work Schedule and click the edit icon next to Daily Focus Work goal to set your own target between 1 and 6 hours.
Work Schedule
Your work schedule tells RescueTime which hours and days you work. This affects what the Assistant shows you, how your reports are filtered, and when your Focus Work Goal is tracked.
To update your schedule, go to Account Settings → Work Schedule.
Schedule settings
- Target work week: Your ideal number of work hours per week; also used to recommend a Focus Work goal that fits your schedule
- Daily Focus Work goal: Set automatically based on your profile, or manually to a value between 1–6 hours; appears as a progress bar in the Assistant if selected.
- Recommended daily break time: defaults to 2 hours per workday; choose between zero and 8 hours.
- Work week start day: Sunday or Monday; your weekly report is sent based on this.
- Preferred time format: 12-hour or 24-hour; reflected throughout the schedule display.
- Daily report delivery time: when your end-of-day report appears in the Assistant.
How work hours affect your reports and Assistant
- Reports: The By Day and By Hour productivity charts show a grey background for time outside your work hours; you can also filter reports to show only work hours.
- Dashboard: Shows a side-by-side comparison of work-hours vs. non-work-hours activity
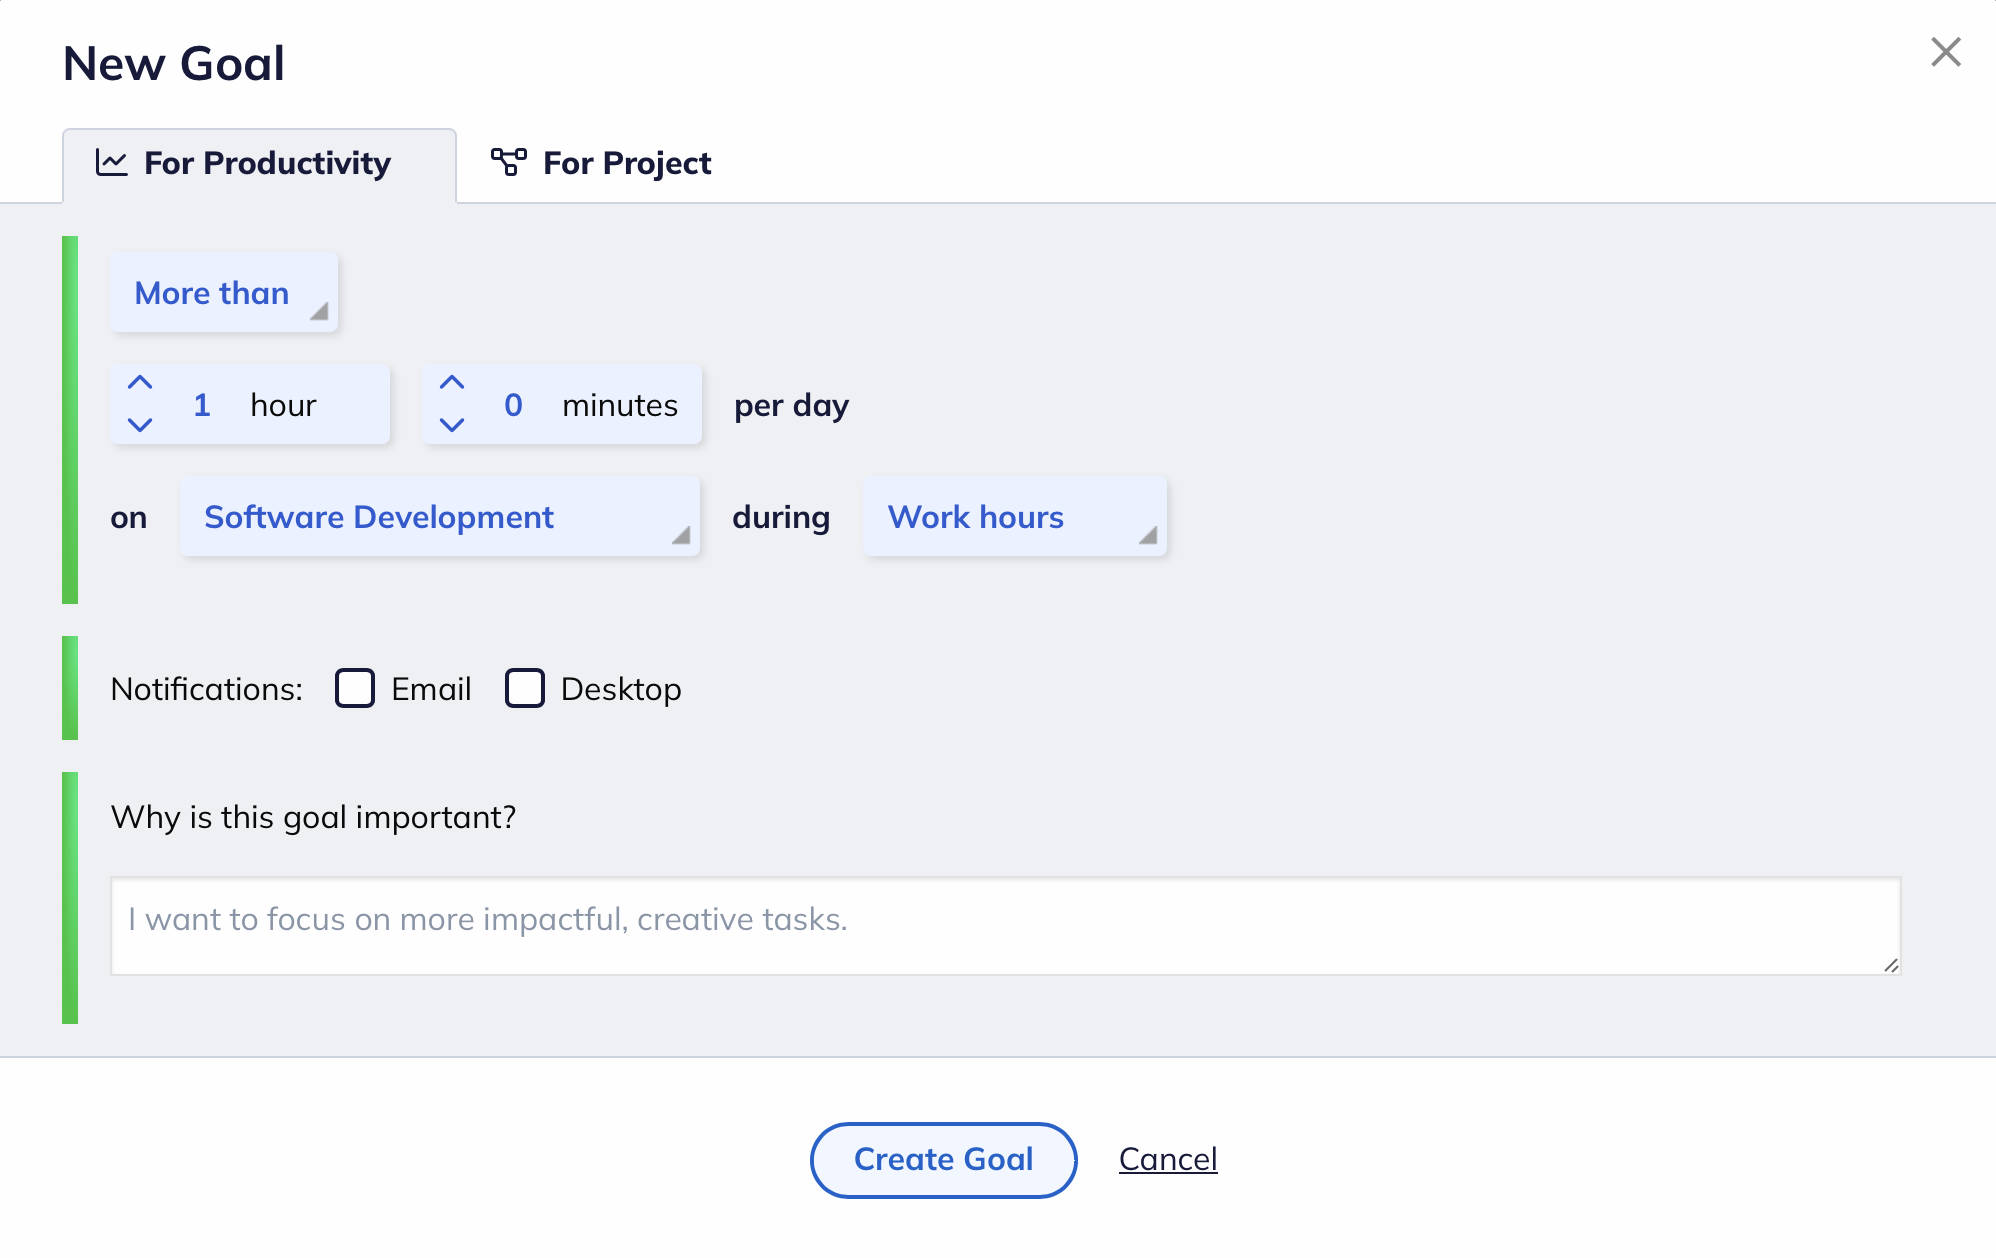
- Goals & Alerts: Goals and alerts can be scoped to work hours, non-work hours, total time, or custom timeframes, giving you more flexibility.
- Assistant: Outside your work hours, the Assistant enters Recharge Time and work activities stop counting toward your Focus Work goal; click Back to Work if you extend your day and want that time included in reports
💡 For the most accurate reports, set your work hours to match your actual routine. A schedule that's too wide (e.g., 7 AM to 10 PM) will mix personal and work activities in your productivity data.
Adding breaks to your schedule
You can build scheduled breaks into your work day. When a break starts, the Assistant notifies you, and activity during break time doesn't count toward your Focus Work goal. Breaks can be at different times on different days, and can vary per day of the week.
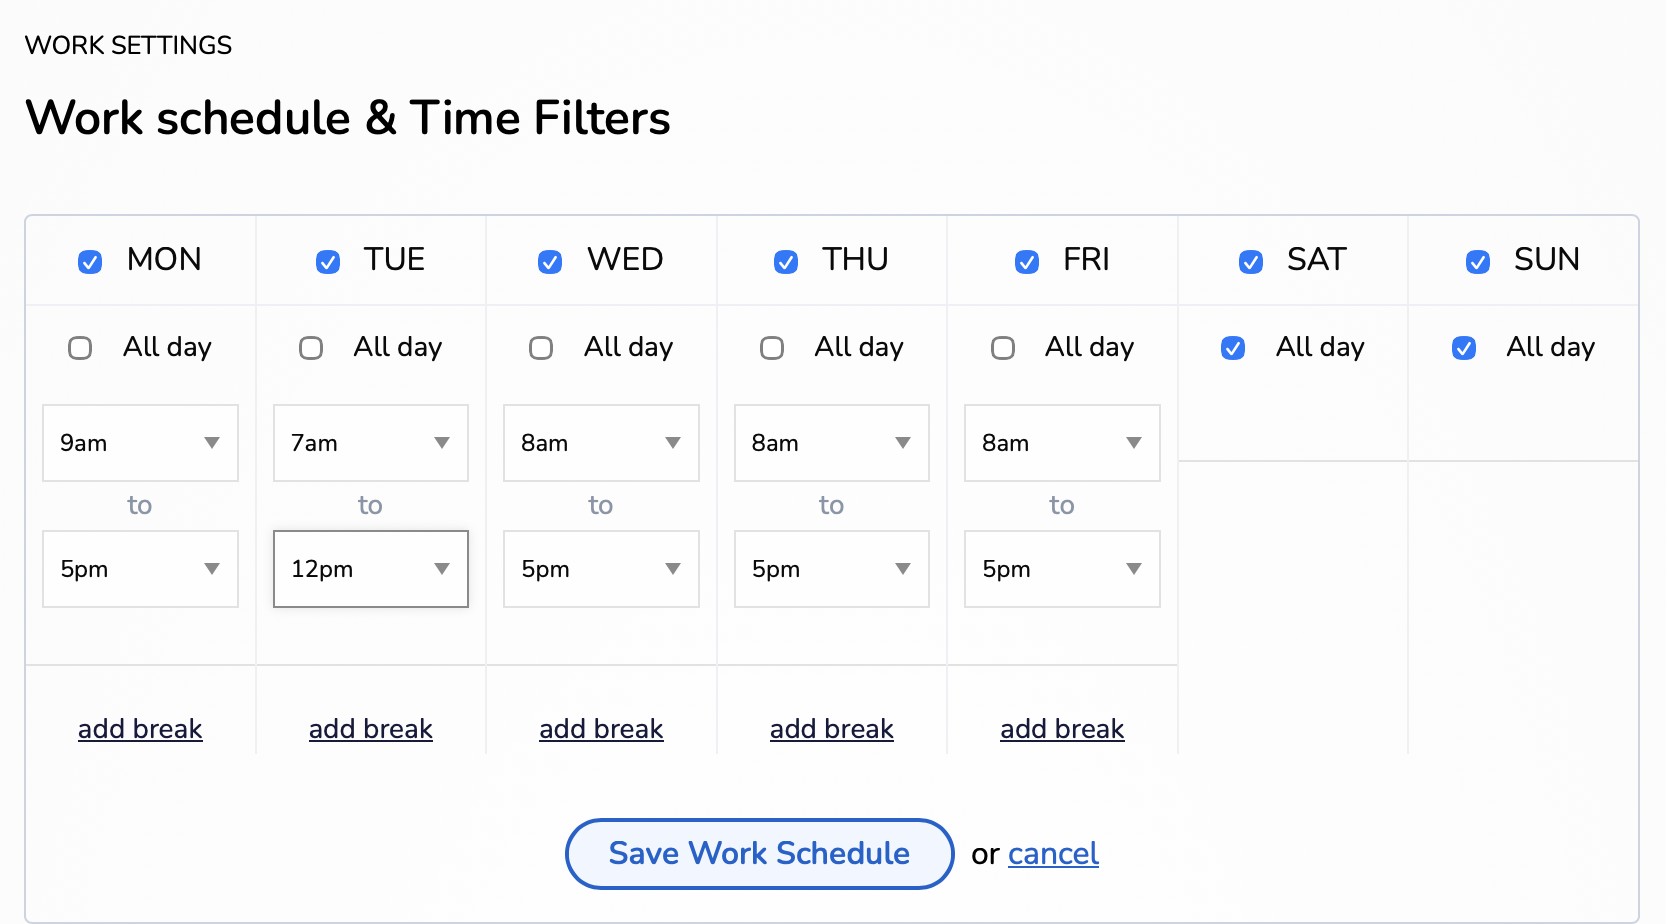
How to add a break
Go to your Work Schedule settings and click Edit Work Schedule. Set your work time in sections around the break. For example, to take a lunch break from 12 PM to 1 PM, enter your morning section from 8 AM to 12 PM, click Add break, then enter your afternoon section. The gap between the two blocks is your break.
Breaks can only be added in one-hour increments.
What happens during a break
- You'll receive a desktop notification when your break begins.
- Activity during break time does not count toward your Focus Work goal
- If you want to skip a break and keep working, click Back to Work and your time will count toward your goal again immediately
Monitoring options
By default, RescueTime tracks all apps and websites during your logging schedule. You can adjust what gets collected from Account Settings → Data & Privacy.
Logging details
Choose whether RescueTime captures full window titles and document names for applications, and whether it logs subject line detail for email programs. Turning these off gives you less granular data but more privacy.
Logging schedule
By default, RescueTime logs 24/7. You can restrict it to specific days and hours instead. For example, you can track activity only during your work schedule. Outside the defined hours, the RescueTime icon in your menu bar appears greyed out to indicate it's not active.
To set a logging schedule, toggle off the 24×7 option on the Data & Privacy page and click Manage Logging Schedule.
Website monitoring
By default, all websites are monitored. If you want to limit tracking to specific sites only, toggle off Monitor all websites and click Manage Whitelist. Only websites on the whitelist will be recorded with their actual URL, and all other browser time is logged as generic browser activity. RescueTime never receives data for sites not on the list.
Ignoring specific apps or sites
You can tell RescueTime to permanently ignore a specific app or website and it will stop recording time for that activity entirely. This can be done from your Apps & Websites Report by clicking the edit icon next to any activity and selecting Ignore this activity forever. Ignored activities can be managed from your Data & Privacy settings.
Use ignore sparingly. Ignoring apps removes that time from all your reports and can make your reports less accurate. A common use case is virtual machine software. If you run a VM, you can ignore the VM application itself and install RescueTime inside the VM instead for accurate tracking.
Notifications and sounds
RescueTime uses desktop notifications and sounds to keep you aware of your progress, alert you to goals, and signal the start of Focus Sessions. There are two places to configure these.
OS-level notifications
RescueTime notifications are delivered through your operating system's notification system. You need to allow them there before they'll appear on your desktop.
On macOS:
- Go to Apple Menu → System Settings → Notifications
- Scroll to RescueTime and click it
- Toggle Allow Notifications on
- Optionally customize how notifications appear and whether they include sounds
On Windows:
- Open Start Menu → Settings → System → Notifications & actions
- Scroll to RescueTime in the right panel and click it
- Toggle Notifications on
Assistant sounds
RescueTime can play sounds when you toggle tracking on/off, trigger an alert, or start a Focus Session. To enable or disable these:
- Click the gear icon in your Assistant
- Click Status sounds to toggle the checkbox on or off
💡 If you're not receiving notifications even after enabling them in your OS settings, check that RescueTime is running and that Do Not Disturb (macOS) or Focus Assist (Windows) is not turned on.